Friday, September 28, 2012

Extreme Close Up........and another publication!

Hello, we're almost there at the weekend thank goodness.  It's been a pretty busy week in our house and will probably carry on through for.....like......ever I'm guessing!

I realised I hadn't shared another stroke of luck I received a couple of months ago, some happy new from Canadian Scrapbooker.


      Fall 2012 Cover

I'd finally plucked up the courage to send a layout to them for consideration, and just when I'd completely forgotten about it ( I didn't realise how long these things take!), I got the e-mail requesting 'said layout' for publication in the Fall issue!

Happy dance for me!!


Anyhow, I now have a copy of the latest issue in my hands which means I'm able to show the page on here.

Here goes 'Extreme Close Up'......page 44 in case you need to know (lol)


This photograph of my youngest always makes me smile.  It was one of those where I was trying to take a quick snapshot and she kept heading straight for the camera till we were practically nose to nose!  Hence the idea for this page.

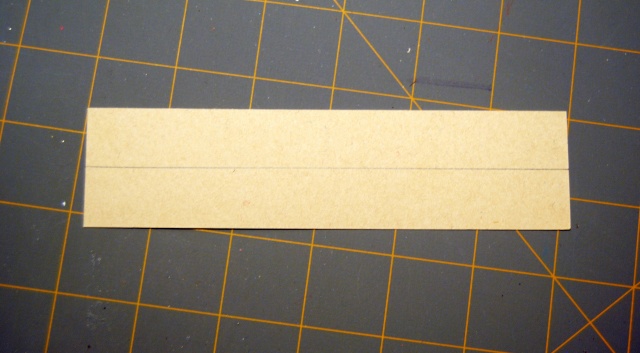
A fairly simple layout really,  3 layers of patterned paper (Fancy Pants) stitched together with the photograph between.


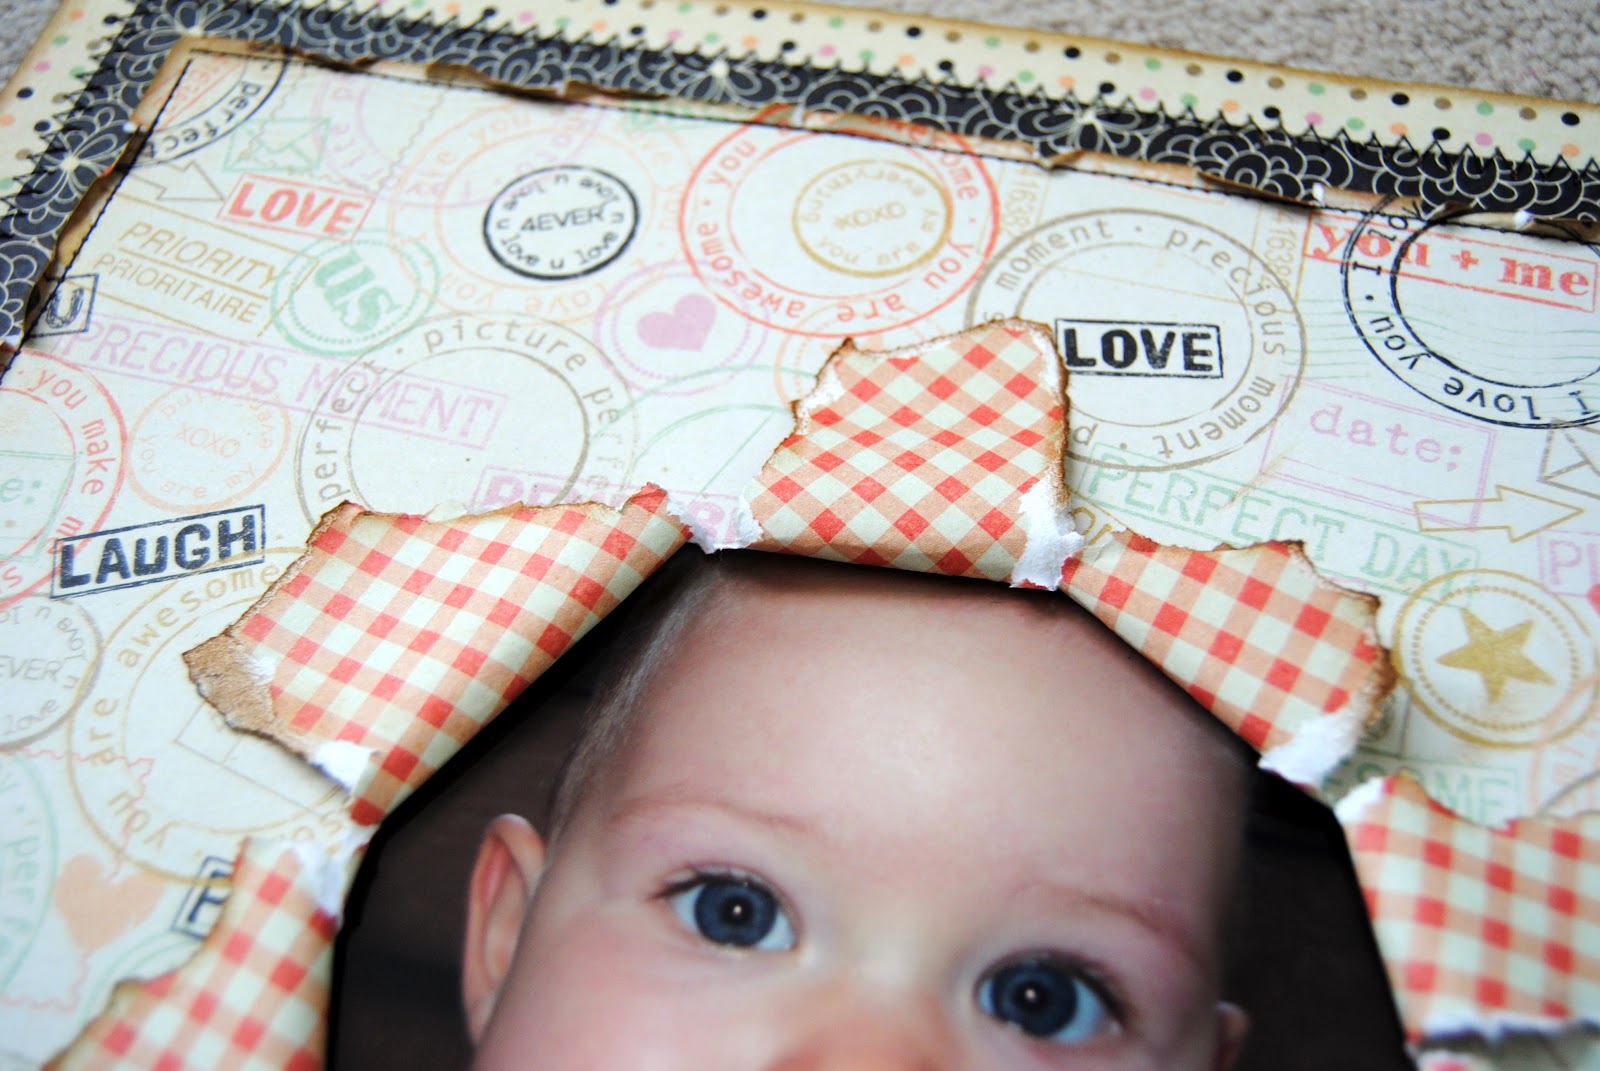
I hit the jackpot when I found these alpha's from The Girls Paperie sitting in my stash.  Added some covered chipboard to the page together with tulle and a button.


I'll be back next week with something to show you (I hope!), so till then, have a great weekend and I'll see you soon,
Jayne.x.

Wednesday, September 26, 2012

You're a lifesaver!

Hello again.

Time for a card today me thinks.

I've used another Saturated Canary image (you might have guessed how much I like em ) and this one (along with a few others!) has been coloured and sitting very patiently on my desk, waiting to make it's way onto a card.

The perfect occasion arose when I needed a 'Thank You' card for an awesome partner in 'crafting' crime, who kindly stepped in to look after fish, hamsters and probably any other living thing in my house, while we were away for a few days!

Carola the animals are grateful, as are myself and the kiddo's!

Anyhow on to the card, and for a change, this one's coloured with Prisma pencils and OCMS.


Sorry for the light on this photo but it was taken in the evening.

I've loved this image since I first saw it, but wasn't quite sure what I'd use it for.  That said, did you like my wit there with the sentiment, turning it into a 'Thank You' huh?  Not just a pretty face you know, I had to use my brain for that one!

As mentioned before colouring is with pencils.......


and papers are from Authentique's 'Fresh' collection.


Thanks for checking in today and hopefully I'll be back again sometime this week......if I can come up with something to post!

Have a great day,
Jayne.x.

Monday, September 24, 2012

Nanna

There's been a fun little challenge running on the Two Scrapbook Friends Forum for the last couple of weeks.......a Back To School Menu challenge.

You pick 5 or more items for your lunchbox from the list of foods/drinks provided, and a couple of days later a new list of crafty related items are posted, to correspond with those you've chosen.  You then have to use/include these items on your project, clear as mud.....yes?

Anyhow that's the basics but all you really need to know here is that I decided to give it a go, and what my 5 items are.

They are as follows:

Include a pennant/banner
Use at least 2 fonts
One or more circles
A natural fibre (eg. burlap)
Include a die cute

So with these in mind I had a little time to create at the crop last week, and came up with a page........no re-inventing the wheel here, just a nice simple page.


As required, we have pennants and a couple of fonts...........


a die cut (Nestabilitie), burlap flower (and feathers) and a punched circle...........


There's also some 'fussy cutting' just for fun (cause we all know how much fun 'fussy cutting' can be!!).


The layout for this page was inspired by sketch #65 over on Sketch Savvy and papers are from Echo Park.

So that's it for today, I'll be back later in the week with a card.
Till then have a good one,
Jayne.x.

Friday, September 21, 2012

Designed To Colour

For those of you out there who love to colour in any medium...........Copic, pencils, watercolours, paints etc. you will probably be aware of  new magazine that was released a few months ago called Designed To Colour.

Designed to Color


This little gem is dedicated to the world of colouring in any form, and is a great read for anyone remotely interested in that field.

I couple of months ago I was fortunate enough to have a card accepted for publication......ME........WOW a first for sure (of course I'd like to say that's because it was the first thing I've ever submitted! (lol))

Anyhow, I've since received my own copy in print, and the allotted time has passed, which means I can post the card on my blog, so here goes.


Now I don't mind admitting it's a pretty simple card but there's a story that goes with it.

I made and submitted this card pretty close to the deadline, day before I believe.........I know what you're thinking......"Me, last minute.......surely not!", but I only discovered the magazine on this day and decided what the heck I may as well give it a go.

So I dug out my Copic's, made the card and sent it that afternoon.  I was thrilled when it was accepted but then felt a little guilty.  I almost wanted to e-mail them back explaining I should probably do better!  Still I was/am super excited and will take it no matter what.

The digi for this one btw is from By Lori Designs - quite appropriate really as these were the very first images I ever coloured!  Papers are from Authentique.

If you'd like to check out the magazine, head over to their blog where you'll find a free preview of the latest issue (I'll be making an appearance in that too!:).

Have a great day and I'll see you soon,
Jayne.x.
-------------------------------------------------------
Challenges entered:
Digi Doodle Shop Challenges - #125 Anything Goes
My heart Pieces Digital Stamp Challenge - Anything Goes
Paper Crafting Journey - Use a Sentiment
Dude Time Doodles Challenge - Use a Sentiment
Simon Says Stamp - Emboss It
The Perfect Sentiment - #50 Masculine Birthdays
Whimsy Stamps - #51 Anything Goes

Scrap-Creations - Embossing
Papelitos Challenges - #12 Anything Goes
Sassy Cheryl's Digi Stamps Challenge Blog - #133 Use a Die-cut
Shopping Our Stash - #69 Embossing
Through The Craft Room Door - #36 Anything Goes
Hooked On Craft Challenges - #24 Masculine Cards

Thursday, September 20, 2012

Peas in a Pod!

Hello again, how's the week going so far?

I think I've finally cleaned up and dried out from the muddiest, soggiest Field Trip ever on Tuesday, in the history of Field Trips!  My washing machine will never be the same again, and the brand sparkling new rubber boots we each had, are still sitting in the garage, waiting for me to hose them down.  I'll bring myself to do it eventually!

Anyhow, on to happier thoughts.  My final layout from my recent Two Scrapbook Friends DT kit, using Prima's Doodle-Deux, is at last making an appearance.

Fussy cutting crazy on this one.........'Peas in a Pod'..........


I think this is my favourite page from this months kit.

Did I mention fussy cutting, cause there's a whole bunch of it on here together with a few canvas flowers thrown in there.


I also loved this idea I saw in a magazine recently of punching like crazy, so I got to work with my new Cropodile.  Had to add a little doodling too, frames everything nicely.


A little more fussy cutting around the title, from various sheets of PP, and another page completed for 'the book'!


Have a great day.....I'm making it a lazy one here, and I'll see you tomorrow,
Jayne.x.


Monday, September 17, 2012

Bring out the Brads!

Good morning and a happy Monday to ya!

Saturday I had an awesome day of scrapping with a wonderful group of ladies (big thanks to Christa and Ann for all your hard work) and was pretty productive for a change!

Today I was going to post the last project from my recent DT Kit, but realized sometime over the weekend that I had almost (but not quite!) forgotten that it's my turn for this weeks 'Crafty Challenge' over on the Two Scrapbook Friends Forum.

With that said, the final installment of Prima's Doodle-Deux will have to wait until later in the week........I'm sure you can stand the suspense, yes?!!

Anyhow, on with the challenge.

Today I thought we'd take things back a little once again.

I'd like you to use some of those once loved (and probably forgotten!) embellies...........Brads or Eyelets!

These little beauties have had somewhat of a revival in the scrapbooking world recently, and I for one am guilty of not using them as much as I should.

So here's your chance to dig them out and put them to good use. If you've been scrapbooking for 5 years or more I know you have some in your stash somewhere, so come on ladies, let's see what you can do with them.

Here's my page for today, using Simple Stories 'Fabulous'.


I used brads to create a couple of circles on my layout but you can do whatever you please.


A little touch of sewing (thanks Dee for reminding me to do this!) and we're done.


I hope you'll get a chance to play along with this weeks challenge......don't forget to upload to the Gallery and Forum and I look forward to seeing what you create. 

I'll be back here before you know it so till then, enjoy,
Jayne.x.

Friday, September 14, 2012

I'm so lucky..........

Happy Friday all!

I'm back today with a quick post showing a card creation from my Two Scrapbook Friends DT Kit, using Prima's Doodle-Deux collection.

Now if you happened to have seen my previous projects here, here and here, you'll have noticed a common theme of 'fussy cutting' elements from the various sheets of PP. The downside to fussy cutting your patterned papers is that you end up with gaping holes, therefore not leaving a whole lot left to create a card!  However, I persevered.....my solution is 'patchwork' inspired..........


 There are also a few more fussy cut pieces glued or 'popped' on there to add interest, and the sentiment.  A white Sakura gel pen provides the stitching as I was just too lazy to sew those six pieces of paper on there!


I used Word to complete the sentiment inside and there we have it.


I have one more project left to show you from this collection - a scrapbook page, but you'll have to wait for Monday for that.

I'm out at a crop all day tomorrow with a lovely group of gals, which I'm so looking forward to.  Not so much looking forward to the packing/prepping I have to do today!  All in a good cause though.....it may result in more goodies to show on here.....fingers crossed!

Have a great weekend and I'll see you Monday,
Jayne.x.

Wednesday, September 12, 2012

Day Trippin'

Good morning.

It's a beautiful Fall (Summer!) day here and we're half way through another week, so hope things are going well for you.

I'm back with another scrapbook page today, using Prima's Doodle-Deux collection from my recent DT Kit with Two Scrapbook Friends.

This one shows photo's from an impromptu day trip to Toronto earlier in the year, on a beautiful Spring day, so here goes............


The smaller shot on there had my husband lying on his back on the concrete, to snap an upwards view of my girls and the CN Tower.

You may notice a common theme through all of my projects using this collection.....fussy cutting and lots of it - always a useful solution if you feel a paper is too busy for your needs.

There's a random layering of pennants (all cut from the patterned paper) together with Washi tape and a couple of buttons tucked in there.


The torn, layered circle also adds more dimension to the page.


The accordion embellishment is made from ordinary black card stock and a border punch.


The white circles are doodled on there by hand to tie in with the theme and patterns on the papers, and the little chick is fussy cut from a sheet of PP.

For the title I dug into my stash of forgotten and barely used eyelets......really need to use these more often!


So that's it for today.

Enjoy the glorious sunshine and I'll see you on Friday.
Take care,
Jayne.x.

Monday, September 10, 2012

Friends are like flowers.........

Good morning, it's Monday so I thought I'd start the week with good intentions and post on here.

I'm back today with my second project from my last Two Scrapbook Friends DT Kit, using Prima's Doodle-Deux collection.

One of these days I'm going to remember to take a photo of what's included in my kit before I actually attack it with my scissors.  It hasn't happened so far so you'll just have to use your imagination for now!

Most of the papers in this collection have a lot of pattern on there, beautiful detail but quite busy, so for this project (the altered item!) I got to work with the scissors..........lots of fussy cutting.


I attacked a very inexpensive dollar store canvas, with a combination of a banner stencil and a couple of different shades of mist.  You can also see the variety of fussy cut paper elements, together with a few canvas flowers thrown in.


One of those Michael's $1.50 bin felt birds I'm so fond of, sits on top of a Dienamics die cut branch.............


 A simple combination of alpha stickers finish things nicely.


I'll be back soon with a scrapbook page using this collection, so stay tuned for more Prima goodness.
Have a good one,
Jayne.x.

Thursday, September 6, 2012

Tooth For A Pair and a sketch.

Well the kiddo's are back to school and for the first time since around May, the house is quiet and I have a little time to myself.  I still haven't quite found my way back to my scrapping closet on a regular basis, but I do have something for you today.

I thought it was about time I revealed creations from my last DT Kit from Two Scrapbook Friends, so I'm starting with a layout.  It was also my turn this week for a Sketchy Challenge on the Two Scrapbook Friends Forum, so killing two birds with one stone, I converted this one into a sketch......I'll post that at the end.

For this kit I was given products from Prima's 'Doodle-Deux' collection and I'm not going to lie to you.........when I first heard that this was the product I would be working with, my initial reaction was shock (maybe even a little horror!) but most definitely panic.

I'm not saying this line of product is bad.....it's gorgeous, it's just that it's not something I would usually buy.  I tend to steer clear of papers that are overly busy, as I sometimes struggle in deciding what to do with them.

However I'm here officially eating my words. Once I relaxed, breathed a little and started to get my hands dirty, this line was so much fun to work with, certainly the most fun I've had yet with a DT kit.

So without further ado, here goes.........'Tooth For A Pair'


As the title suggests, the theme for this page is pretty light hearted and the same goes for the layout.  Several cut strips of patterned paper form a matt for the photo, embellished with a Washi tape/toothpick flag combo.


Washi tape again comes to the rescue together with natural hemp, to form a homemade banner.


I also couldn't resist a subtle touch of doodling on there........it is called 'Doodle-Deux' after all!


 As promised here's the sketch for this layout.


If you can use it please do, and if you'd like to join in with this months Sketchy Challenge over on the Forum, we'd love to see your creations.........just upload to the Gallery and Forum by October 15th.

Well that's it from me for today but I hope to be back tomorrow with project #2.

See you then,
Jayne.x.

Saturday, September 1, 2012

Accordion stars........a tutorial!

Well hello there!

I've been meaning to put this on here for a while, as a follow up to the accordion hearts Friendzy Friday I did for Two Scrapbook Friends a while ago. I figured out a couple of templates to create accordion stars which you may find useful.

Apologies if some of the photo's are a little shadowy (it was late!) but here goes:

1. To create your template for a 6 point star, start with a piece of cardstock 6" long by whatever width you'd prefer. Mine is 1 3/4" wide which seems to be a good size to use as an embellishment for a scrapbook page, but you can increase/decrease however much you'd like. Mark the center line through your card (in this case 3/4")


2. Make a mark at 2" and 4" along this center line.


3. Along the top edge of the template, make marks at 1", 3" and 5".


4. Join these points starting at the center line on the very edge of the card, all the way through to the far edge, to create triangular points, and carefully cut around.


5. Cut a strip of your chosen patterned paper 12" by 1 3/4" and score at the center point (6").


6. Fold at this point (with the chosen pattern inwards) and place your template on top.


7. Draw around and cut out. Once opened, you should have a symmetrical pattern like this.


8. The rest of the process is exactly the same as for the accordion hearts, so go ahead and score along the whole length at 1/4" increments.


9. Accordion fold along the scored lines and join the two ends with a strong glue. I also cut a small circle from scrap card to use as a base for the star.


10. Press out the star (straight edges in the center obviously) and glue down onto the card circle.
Ta daaaaaa!


Not bad....it does tend toward a flower shape so I did try to make the points a little sharper, by instead of marking a center line through your template (3/4"), draw it lower at 1" so that the triangular points will be longer and thinner.

If you'd prefer a 5 point star, the process is the same but your template would be as follows:

1. Using the same size of cardstock (6" by 1 3/4") mark the center line (3/4"). Along this line, mark at 2 3/8" then a further 2 3/8" (this would be the 4 3/4" point).


2. Along the top edge, mark at 1 3/16" then a further 2 3/8" along at the 3 9/16" point.....yes the measurements get a little fiddly but once you've created your template, it's for keeps! Join the points to form triangular shapes.


3. Cut around the triangular shapes. The rest of the process is the same as for the 6 point star except for one step. You do have to remember to place the far edge of your template along the Fold of your chosen patterned paper in order to create the correct shape.


4.If you've placed and cut correctly, your paper should end up looking something like this........


5. Continue to make the star as in the instructions above.


Again, if you'd prefer thinner sharper points on your star, lower the center line on your template to 1" and continue from there.

Congrats if you stuck with me till the end!  I hope you can make some use out of this.......I think they may make an appearance on some of my Christmas pages!
Have fun everyone,

Jayne.x.
Related Posts Plugin for WordPress, Blogger...